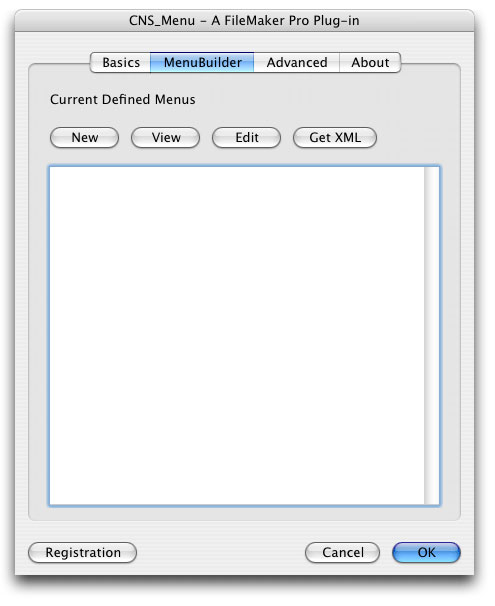
First, open FileMaker® Pro and then open up the CNS Menu configuration dialog. To do this on Windows, go to the "Edit" menu, and select "Preferences". This should bring up the "Preferences" dialog. Next, click on the "Plug-ins" tab, double-click the CNS Menu plug-in, and select the "Menu Builder" tab. On Mac OS X, go to the "FileMaker Pro" menu, and select "Preferences". This should bring up the "Preferences" dialog. Next, click on the "Plug-ins" tab, double-click the CNS Menu plug-in, and select the "MenuBuilder" tab. This list shows all menus that have been created, either through MenuBuilder or through an external function.
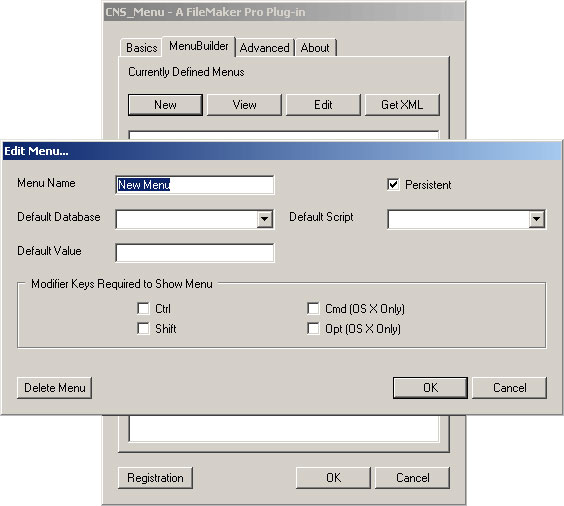
To create a new menu, click the "New" button. The "Menu Name" field is where you specify the name of the menu. The "Persistent" check box, when checked, saves the menu even after FileMaker Pro is closed. It does this by saving an XML file in the "Extensions" folder where the plug-in is installed. By default, a menu created in MenuBuilder will be persistent. Alternatively, a menu created through an external function will not be persistant by default. The "Default Database" field is the default database for all the menu items contained in this menu. If you do not specify a database when defining a menu item, this default database will be used. The "Default Script" field defines the default script for all the menu items contained in the menu. If you do not specify a script when defining a menu item, this default script will be used. The "Default Value" field defines the default value for all the menu items contained in this menu. If you do not specify a value when defining a menu item, this default value will be used. The Modifer Keys check boxes allow you to define keys that are required in order to show the menu. If the specified modifier keys are not held down when you call CNSMenu_ShowMenu, then the menu will not be shown. Instead, the default script will be called in the default database. If you are making a cross-platform solution, you will only want to use the "Ctrl" and "Shift" modifier keys because windows does not have the "Cmd" and "Opt" keys. Click the "Ok" button when you are finished editing to save your changes.
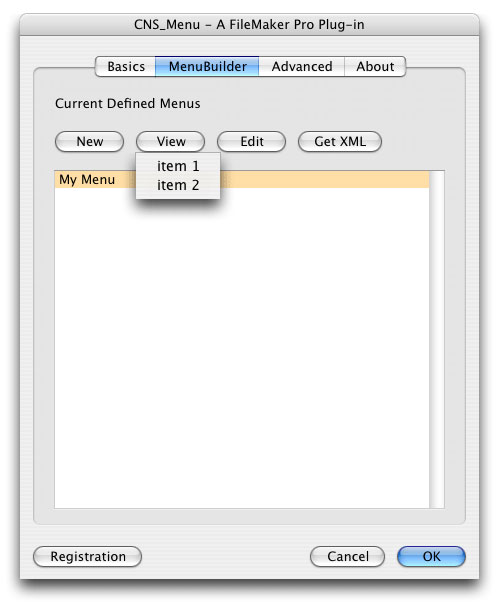
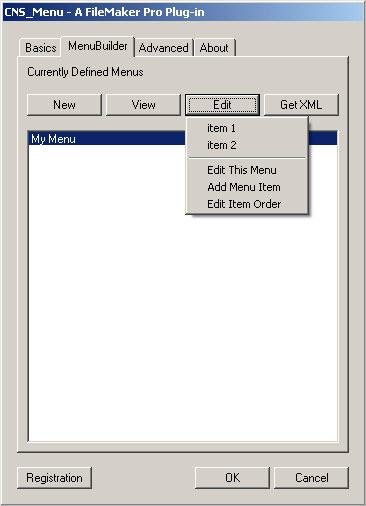
Once you have created a menu, you can select it from the list and click the "View" button to show the menu. This allows you to see what the actual menu will look like without having to go back to your layout.
To edit your menu, select it from the list and click the "Edit" button. This opens your menu in an editing mode where you can change all aspects of the menu. At the bottom of the menu are three editing menu items, including "Edit This Menu", "Add Menu Item", and "Edit Item Order".
The "Edit This Menu" choice allows you to change the settings for the current menu. These are the same settings as described above when creating a new menu. This window also allows you to delete your menu by clicking the "Delete Menu" button.
The "Add Menu Item" choice allows you to add menu items, submenus, separators, and insert menus.
The "Edit Item Order" choice allows you to rearrange the order of your items on the current menu.
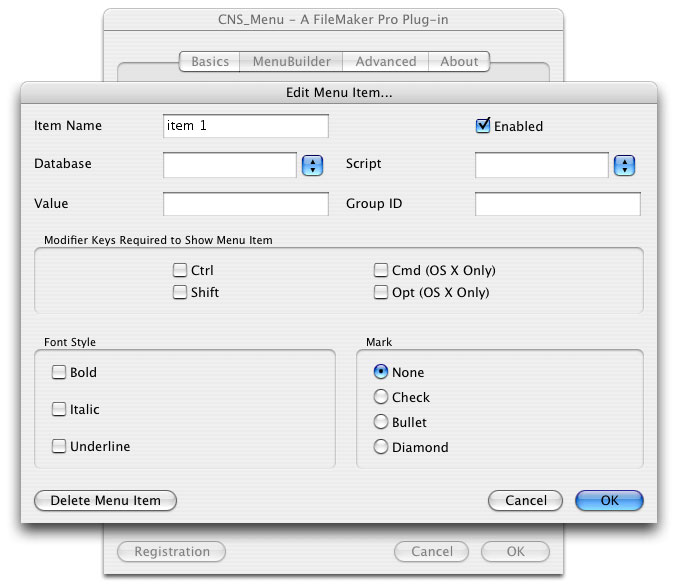
To edit a menu item, click on it to open the editing window for that item. The "Item Name" field is where you specify the name of the menu item. This name will appear on the menu. The "Enabled" check box defines whether or not the menu item is enabled. If the menu item is disabled, it will appear greyed and the user will not be able to select it. The "Database" field defines the database that contains the script for this menu item. If this is not defined, the default database from the parent submenu or menu will be used. The "Script" field defines the script to be called when the user selects this menu item. If this is not defined, the default script from the parent submenu or menu will be used. The "Value" field defines a user-supplied value for this menu item. This value can be retrieved using the CNSMenu_GetMenuValue function. The "Group ID" field defines a user-supplied group identifier for this menu item. This is used in conjunction with the modifierkeys attribute to selectively show alternative menu items depending on which modifer keys are held down. The "Modifer Keys" check boxes allow you to define the modifier keys that are required in order to show this menu item. If the specified modifier keys are not held down when this menu is shown, this menu item will not be shown. If you are making a cross-platform solution, you will only want to use the "ctrl" and "shift" modifier keys because windows does not have the "opt" and "cmd" keys. The "Mark" radio buttons define the mark that is displayed to the left of the menu item. Click the "Ok" button when you are finished editing to save your changes.
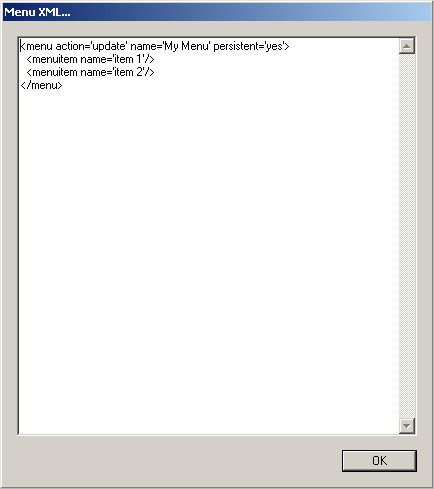
Lastly, select a menu from the list, and click the "Get XML" button. This window allows you to view the XML for each menu. From here you can copy and paste the XML to wherever you need it.